
Welcome! This is the first post in a series on how I set up a Ubiquity Security Camera to Live Stream to YouTube, showing an overlay of local weather information. These posts will cover some of the setup with the Camera, NVR, Weather Station, and Home Assistant setup.
The next post will cover the computer setup with Ubuntu and OBS Studio Configuration, along with addressing some reliability issues using Advanced Scene Switcher.
Check out the Live Stream here!
Camera
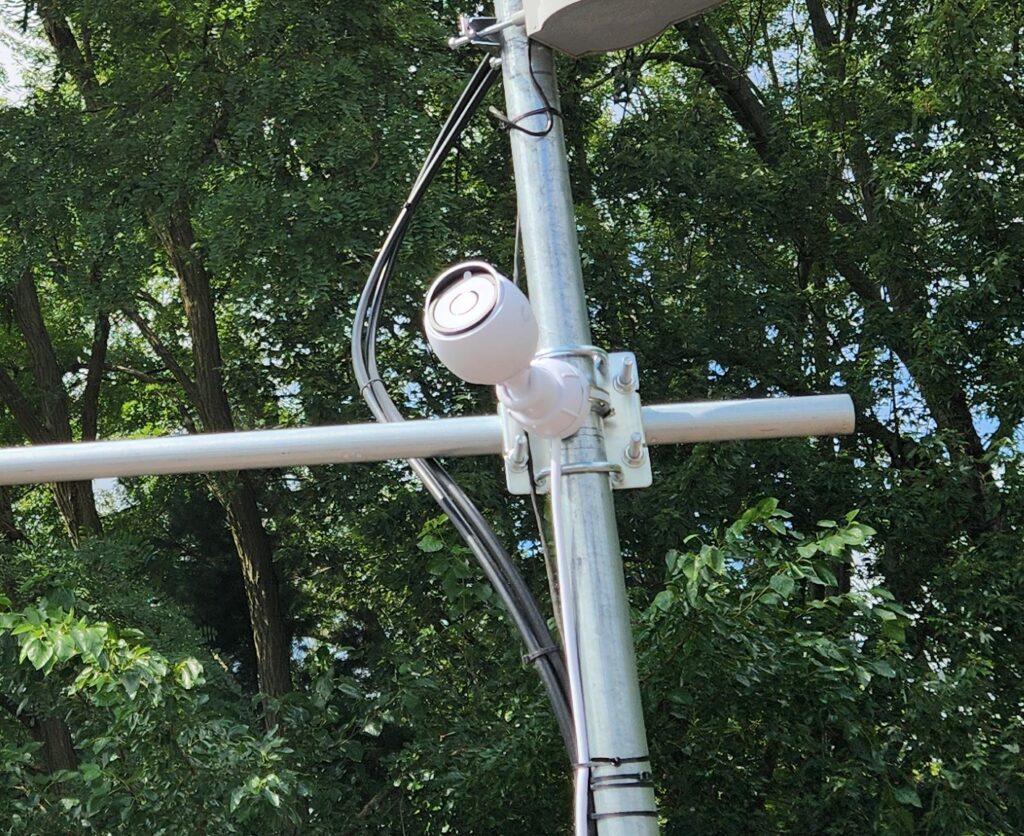
To begin with, I chose a Ubiquiti G5 Bullet Camera, a fairly inexpensive POE camera that is compatible with my existing NVR. This camera (or more importantly, my NVR) supports RTSP, which is how we will connect it to OBS Studio. This camera is rated for outdoor use and includes a pole mount kit. I was able to mount the camera directly to the existing tripod on my roof, facing directly east, pointing up towards the sky.
Cabling & Surge Protection
I used an Outdoor Shielded Patch cable from the camera to the surge protector. I then ran a CAT6A cable from the roof down to my network rack. A set of shielded cables connects the camera to another surge protector and then a POE switch. Finally, I grounded the surge protector.
NVR
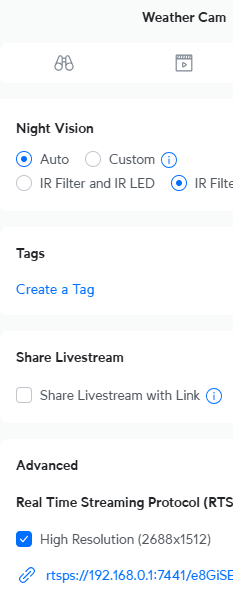
The Camera was added to my NVR, which is powered by Unifi Protect. In the image settings area, I made adjustments to the overlay on the video to add date/time and remove the uniFi logo. Within the advanced settings of the camera, I adjusted the Night Vision settings to disable the IR LED. On the same screen, I enabled the Real Time Streaming Protocol (RTSPS). This is required for OBS Studio to access the camera directly. Enable the appropriate resolution, and make note of the URL that is provided.
Weather Station Setup
My weather station is an Ambient Weather WS-1553-IP. It is mounted on the roof, on a tripod with the camera.
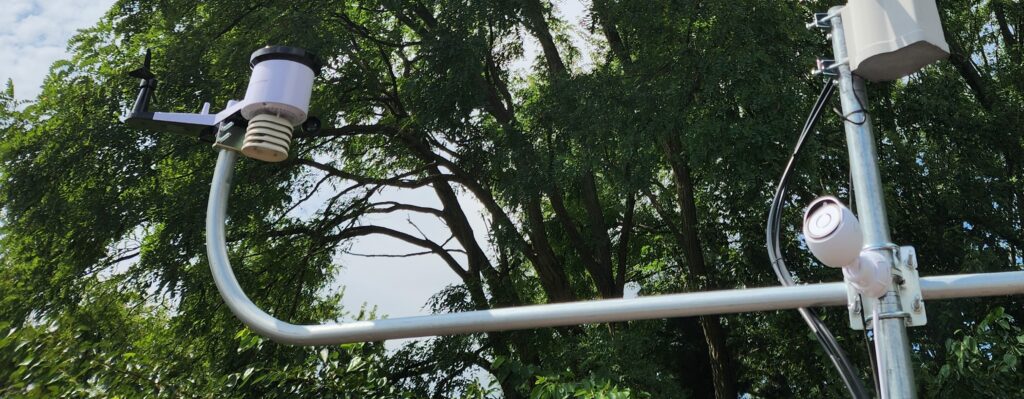
This specific model of Weather Station includes a receiver that can be hard-wired to Ethernet. I configured it to upload the weather data live directly to the AmbientWeather.net website.
Home Assistant
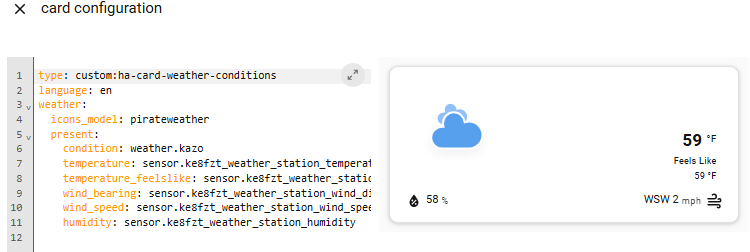
I use Home Assistant as my home automation system. I installed the Ambient Weather Station integration and followed the instructions to connect it to the AmbientWeather.net website using an API key. I added a new Dashboard from the Home Assistant Community Store called ‘HA (Lovelace) Card Weather Conditions’.

I set up the card to show the entities from the Ambient Weather integration. The weather condition isn’t provided by that integration, so I referenced an entity in the National Weather Service integration from the AZO airport, 2 miles away.
Next Post
In the next post, I will cover the computer setup for the livestream, using Ubuntu, Open Broadcast Studio, and Advanced Scene Switcher.